Footer
In this section, you can configure your footer settings. Here you can decide which type of design it should have and what kind of information it should provide to your clients.
Settings
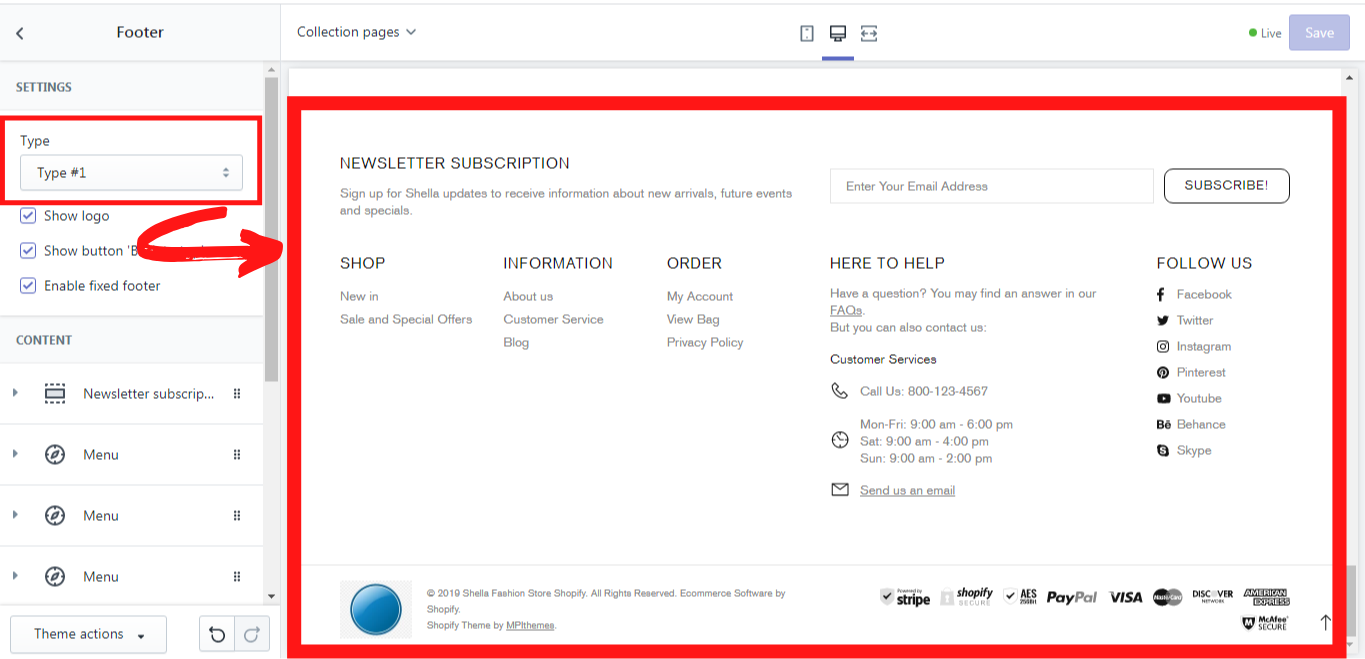
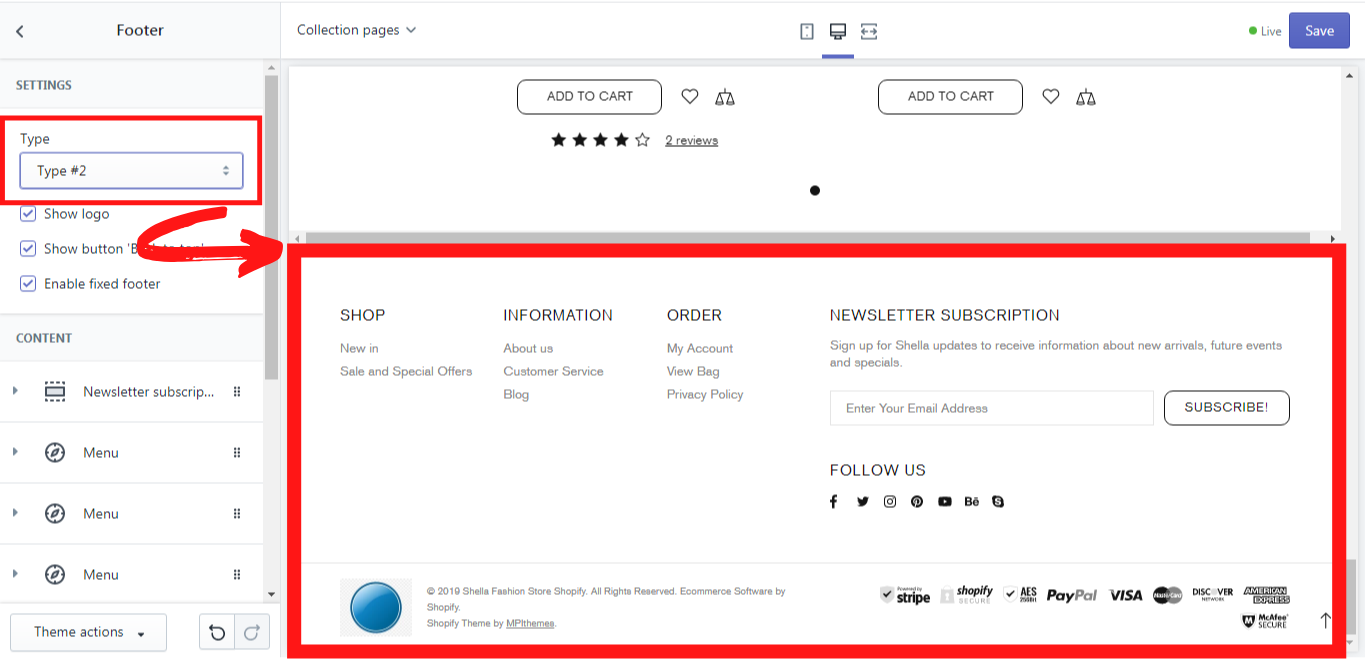
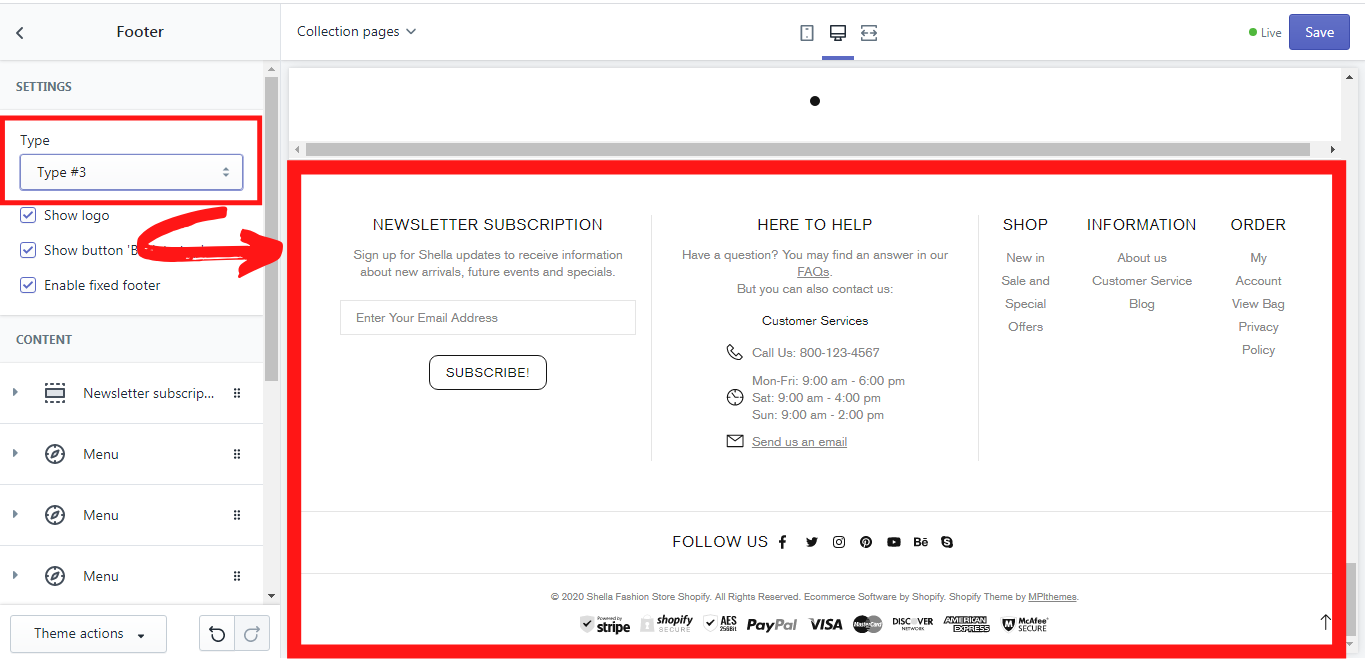
Type
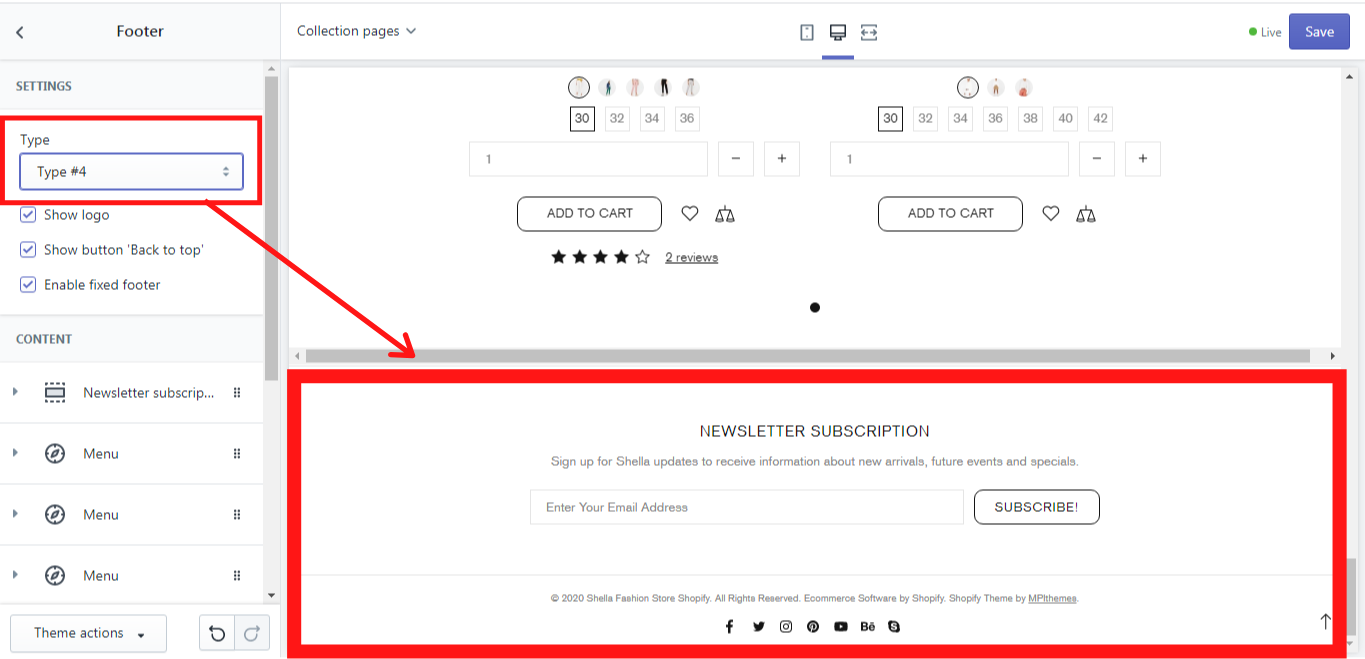
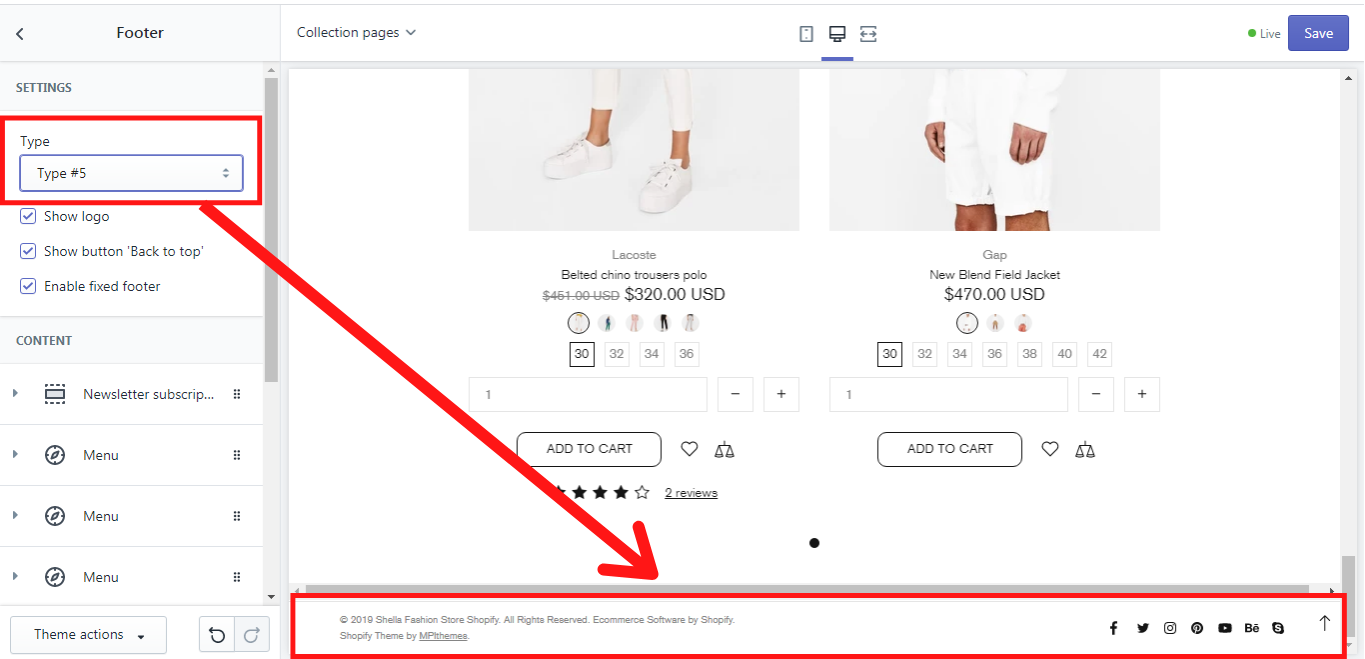
Shella theme offers 7 types of the footer which can be chosen from the dropdown list in “Type”. We will show you, how each type looks like. We have also enabled all possible options and have added all possible content blocks, which is why we would like to pay your attention to the point, that not each type of the footer contains all content blocks and other options. This is what makes them different.
Show logo
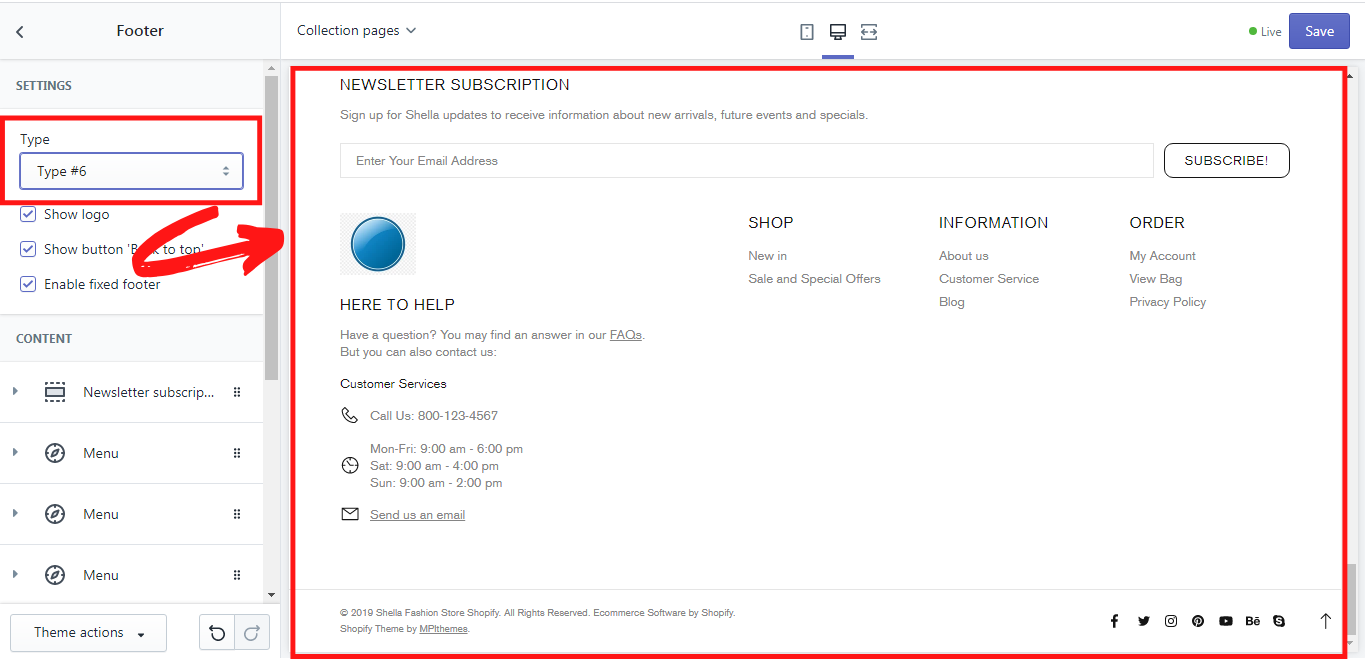
If you enable this option, the footer-logo will be displayed. This option is for the footer types #1, #2, #6. We will show you an example of the logo in the footer type #6:
Show button “Back to top”
This option enables you to display the “Back to top” button. It is available for all footer types. Once the client clicks on it, he or she will be automatically on the top of the page, without scrolling up the browser page.
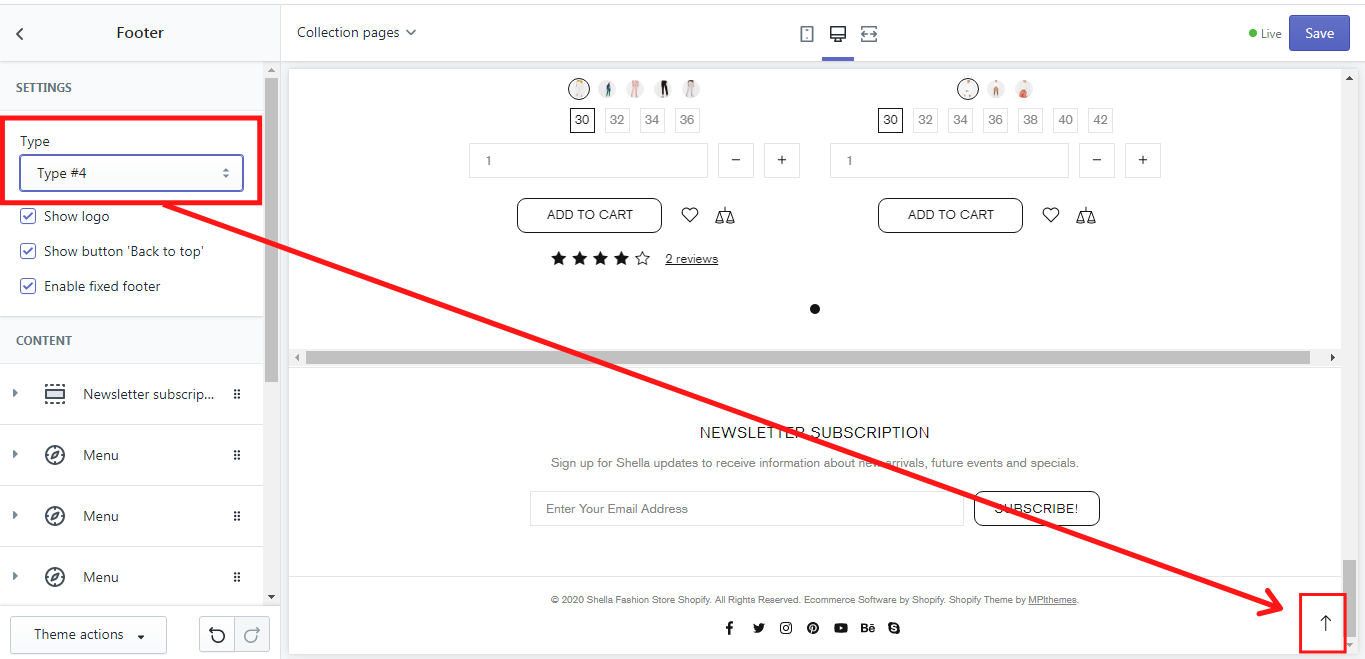
Enable fixed footer
If you enable this option, the footer will be fixed, which means there will not be any space between the footer or the other page content, when scrolling up the browser page.
Content
In this section, you can decide which content should be displayed in the footer. This content can be added or removed with the content blocks, such as menu, custom HTML, social media, subscription, copyright, and payments. Now let´s take a quick glance at each of these blocks.
Content -> Menu
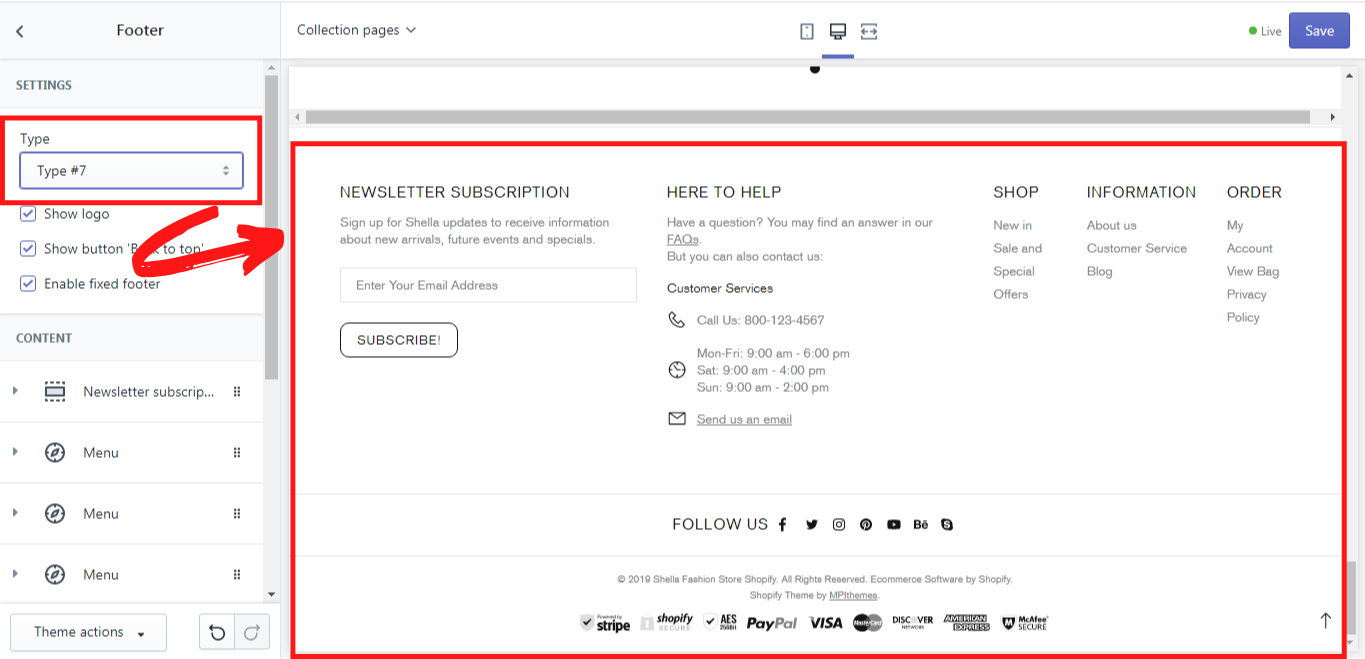
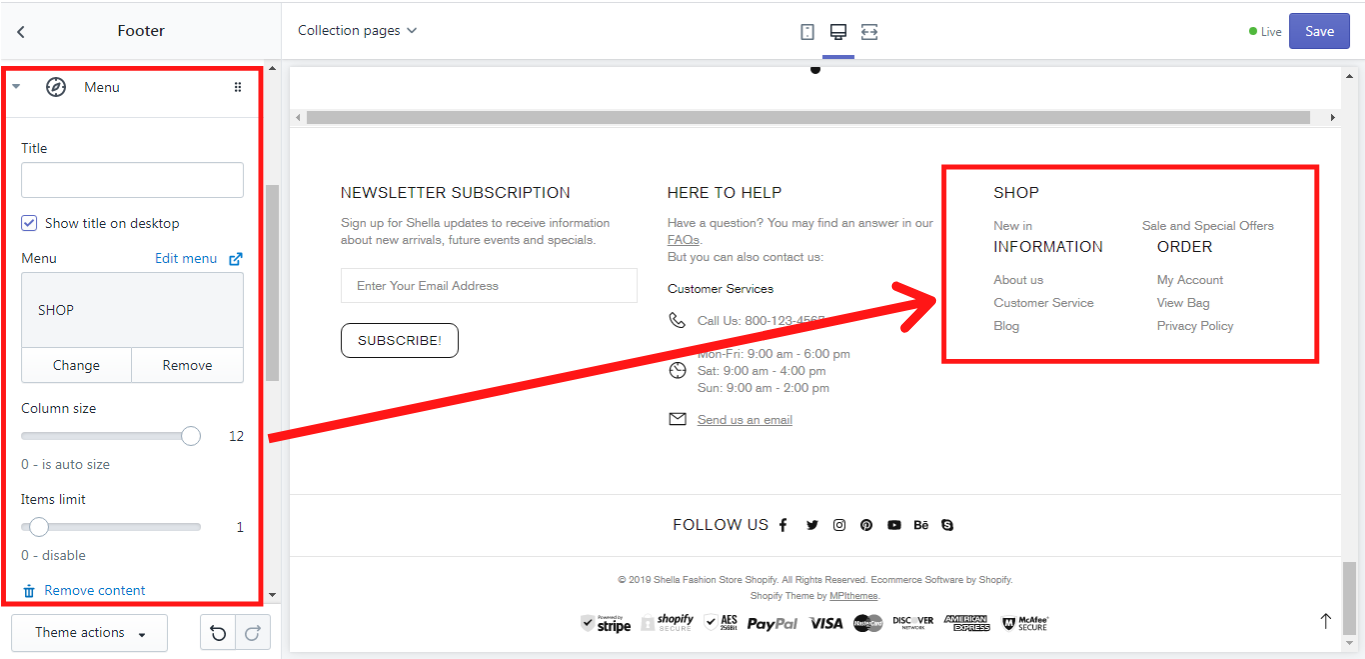
The block “Menu” allows you to add menu items, which you would like to have in the header. You can give this block a title, which will make it easier to distinguish one menu block from another. In order to add content, you need to select a page in “Menu” , e.g.: SHOP, INFORMATION, ORDER. Make sure, that this page was created in the Navigation of your Shopify Admin. How to do that you can read here. The name of the page will be shown in the footer if you enable the option “Show title on the desktop”. You can change the column size of this menu block using a “Column size” scale from 0 to 12, where 0 is a default size. One can also decide, in how many rows the menu items should be displayed, using the “Items limit” scale from 0 to 20, where 0 means the disabling of the limit. You can add such “Menu” blocks as many as you need. In our example, we have added 3 “Menu” blocks to the footer type #7: SHOP, INFORMATION, ORDER. In the menu block “Shop” we have the following settings:
Column size: 12
Items limit: 1 (this limit allows us to have only 1 row for the menu items in the “Shop” menu).
Content -> Custom HTML
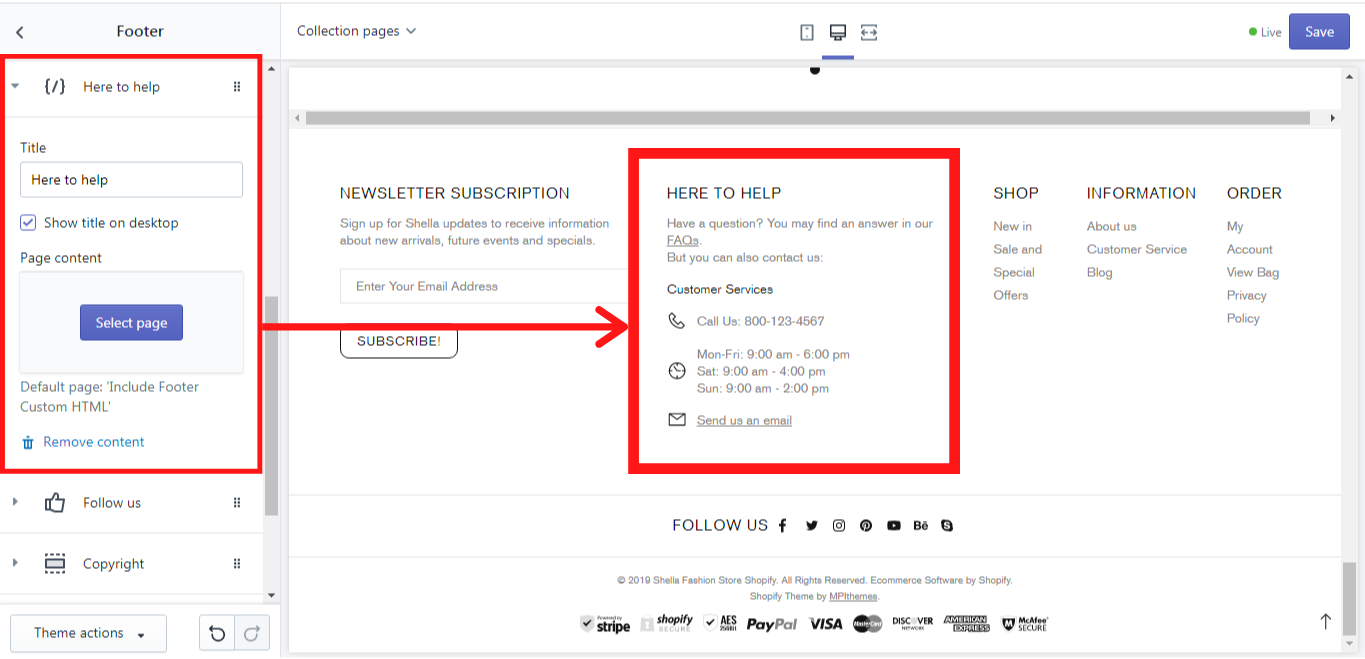
This block allows you to add a page as a content. You may give it a title, which will be the block title, and will be displayed on the desktop. If you don´t want this title to be displayed on the desktop, simply disable the option “Show title on the desktop”. Then select a page in the “Page content”. Make sure, that this page was created in the Navigation of your Shopify Admin. How to do that you can read here If no page was selected, a default page “Include footer Custom HTML” will be displayed. You can edit this page in the Navigation of your Shopify Admin. In our example, we will add the block “Custom HTML” to the footer type #7, give it the title “Here to help” and leave the default page as a page content for the footer:
Content -> Social media
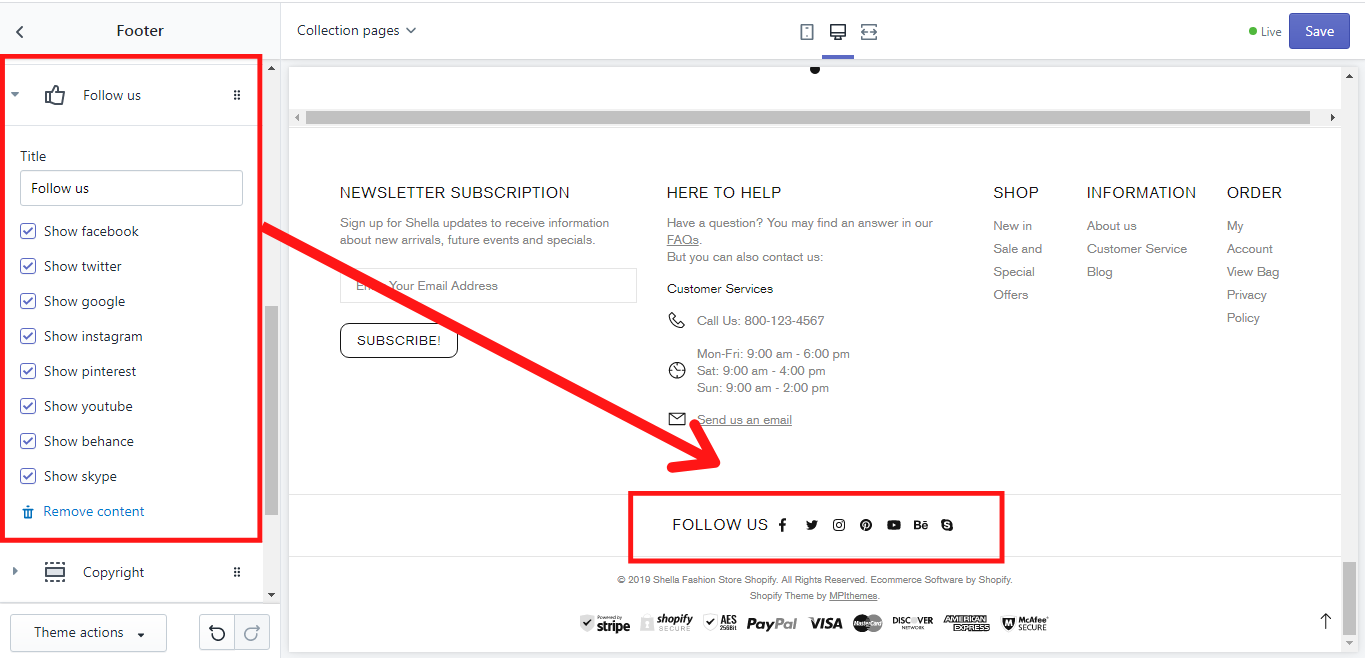
In this section, you can decide what social media labels should be displayed in your footer. You may give it a title, which will be the block title, and will be displayed on the desktop. In our example, we have given this block a title “Follow us” and have enabled all possible social media labels for the footer type #7:
Content -> Subscription
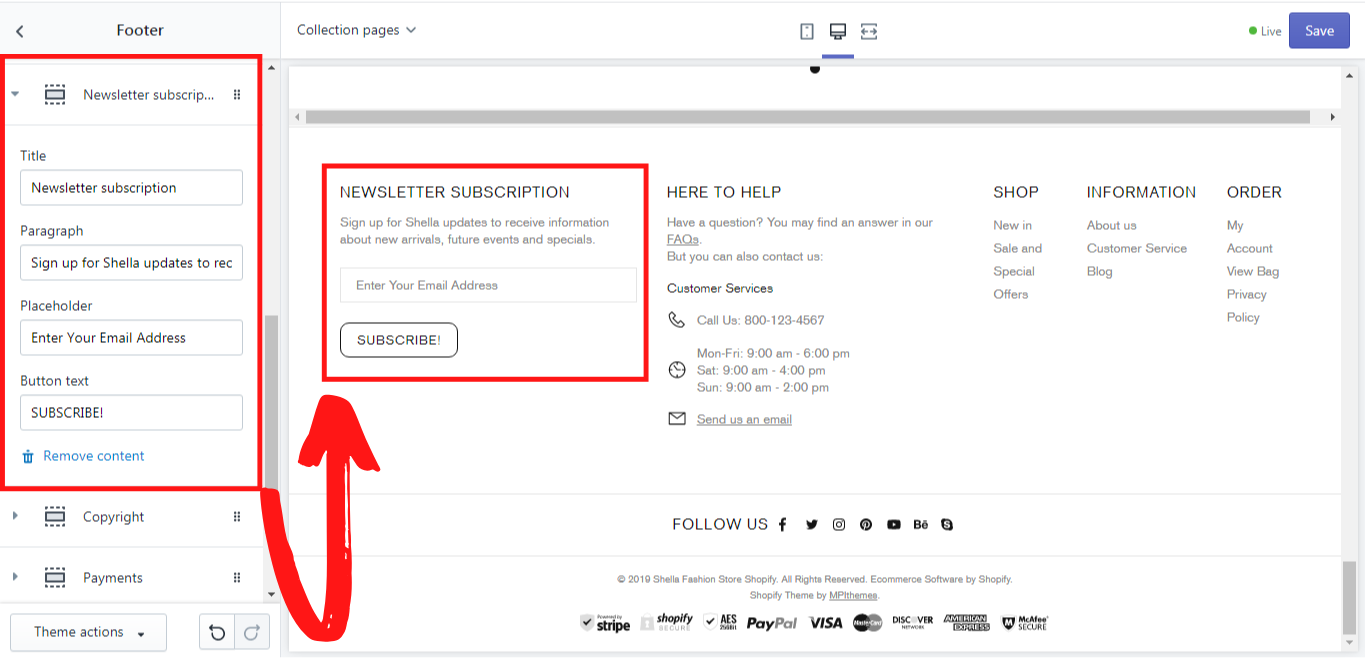
If you need to have a subscription section, you can add a block “Subscription”. Here you can decide what should be written in the title, paragraph, placeholder, and button text. In our example, we have added the following text in the block “Subscription” for the footer type #7:
Title: Newsletter subscription
Paragraph: Sign up for Shella updates to receive information about new arrivals, future events, and specials.
Placeholder: Enter your E-mail Address
Button text: SUBSCRIBE!
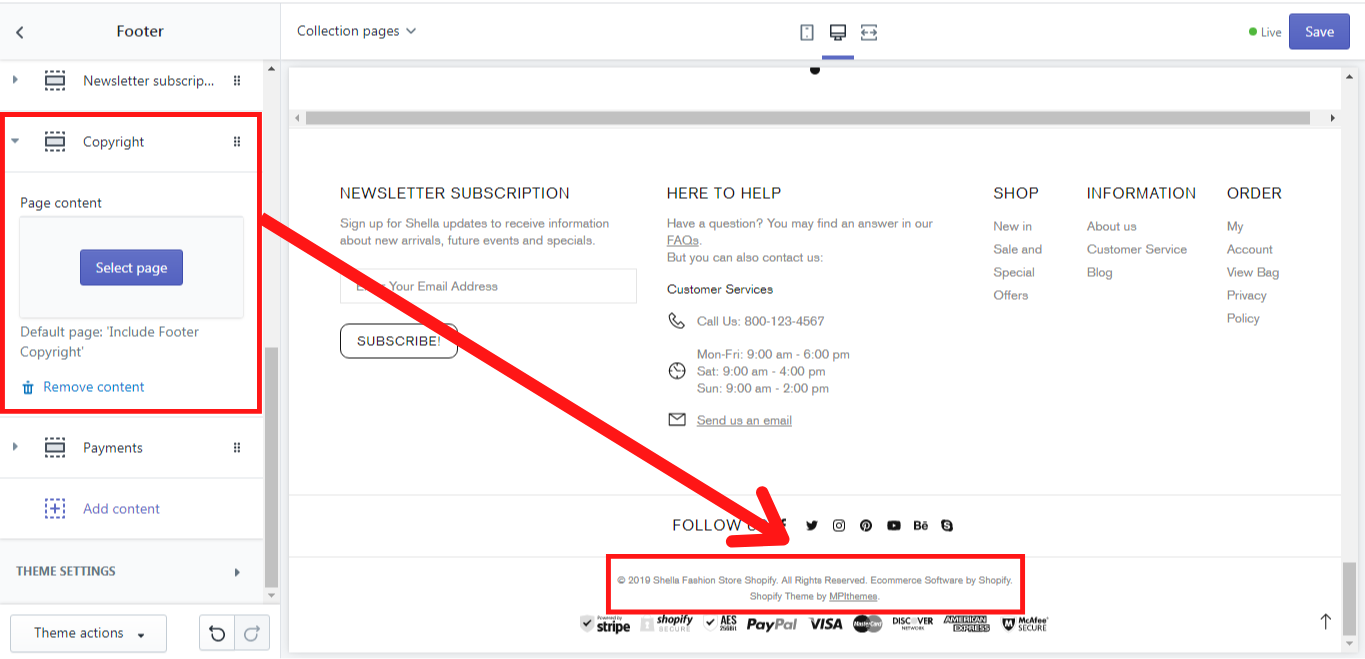
Content -> Copyright
This block enables you to add your copyright. You just need to select a page in the “Page content”. If no page is selected, a default page “Include Footer Copyright” will be used by the theme. Of course, the content of this page can be edited with your information in the Navigation in your Shopify Admin. How to edit a page you can read here In our example, we have left the default page “Include Footer Copyright” for the footer type #7: