Shopify help
Before you start with the theme please check if you are familiar with Shopify software. Pay attention how to add and edit Product, Collection, Navigation menus. You have to be familiar with product tags, product meta fields and general store settings.
Register store
The Shella theme is not an independent product. You must have a Shopify store to use it. Create a Shopify store now if you don't have it.
Shopify offers a 14-day trial period. In case you want more time to prepare your store, consider starting with a development store.
Need to migrate your store to Shopify?
Use the litextension service.
![]()
Automated Shopping Cart Migration Service
Store settings
-
Multi currency at checkout page (optional)
By default theme shows currencies configured at Shopify Payments. If you want to show unsupported currencies by Shopify Payments - enable the info currency conversion at theme settings and configure currency format described below.
Please note. Info multi-currency works only on store pages. Checkout page works in default store currency.
-
Currency format (optional, info multi-currency)
- Go to Store Admin -> Settings -> General
- Scroll down to Standards and formats and press Change formatting link
- Update fields:
HTML with currency to<span class=money>${{amount}} USD</span>
HTML without currency to<span class=money>${{amount}}</span>
-
Allow customer's accounts
- Go to Store Admin -> Settings -> Checkout
- Find Customer accounts section
- Set value to Accounts are optional
- Save changes
Products
Check following Shopify help pages
Shella theme includes Product page and Related products carousel sections
Metafields
Shella theme use metafields for custom tabs, labels, sale countdown, size guide popup, video
Check Shella Metafields paragraph for more details.
Tags
Tags are searchable keywords that you can associate with your product. Tags can help customers find your product through your online store search.
Filters at collection page works based on tags. First, you have to add tags to your products. Second, configure filter block at theme settings.
Collections
Check following Shopify help page about Collections
Shella theme includes Sidebar, Heading, Content and Product carousel static sections.
Navigation, menus
Check following Shopify help page about Menus and links
To configure MegaMenu at theme you have to create nested menu at Online store -> Navigation and second configure MegaMenu popups at Sections -> Header
Get Started
In this article, we help you to install, activate the Shella Shopify theme and recommended apps.
Install theme
-
Download theme package from themeforest.net
You can purchase theme here
- Unzip the downloaded file and find theme's zip file inside
- Log in to your Shopify store
- Navigate to themes. Store Admin -> Online Store -> Themes
- Upload theme
- Publish theme
Video manual. How to install the Shella theme.
Activate theme
You should activate your theme copy. Please check Theme settings -> License documentation page for more details.
A regular theme license allows you to use theme at one store. If you want to use the theme for more stores, you should purchase a new license.
-
Download txt file with theme purchase code from your themeforest.net account
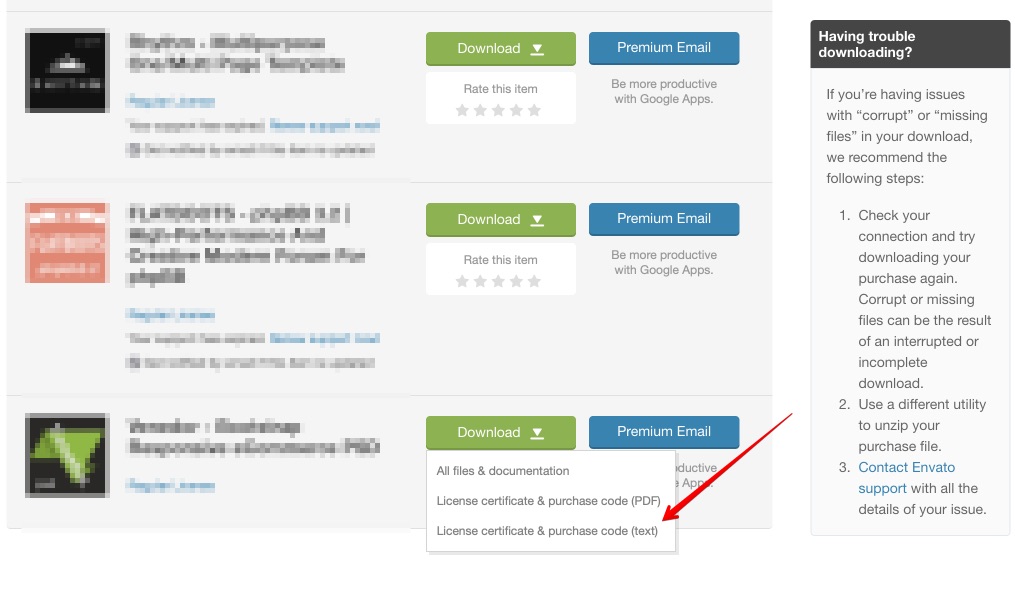
Download the purchase code. -
Find your purchase code
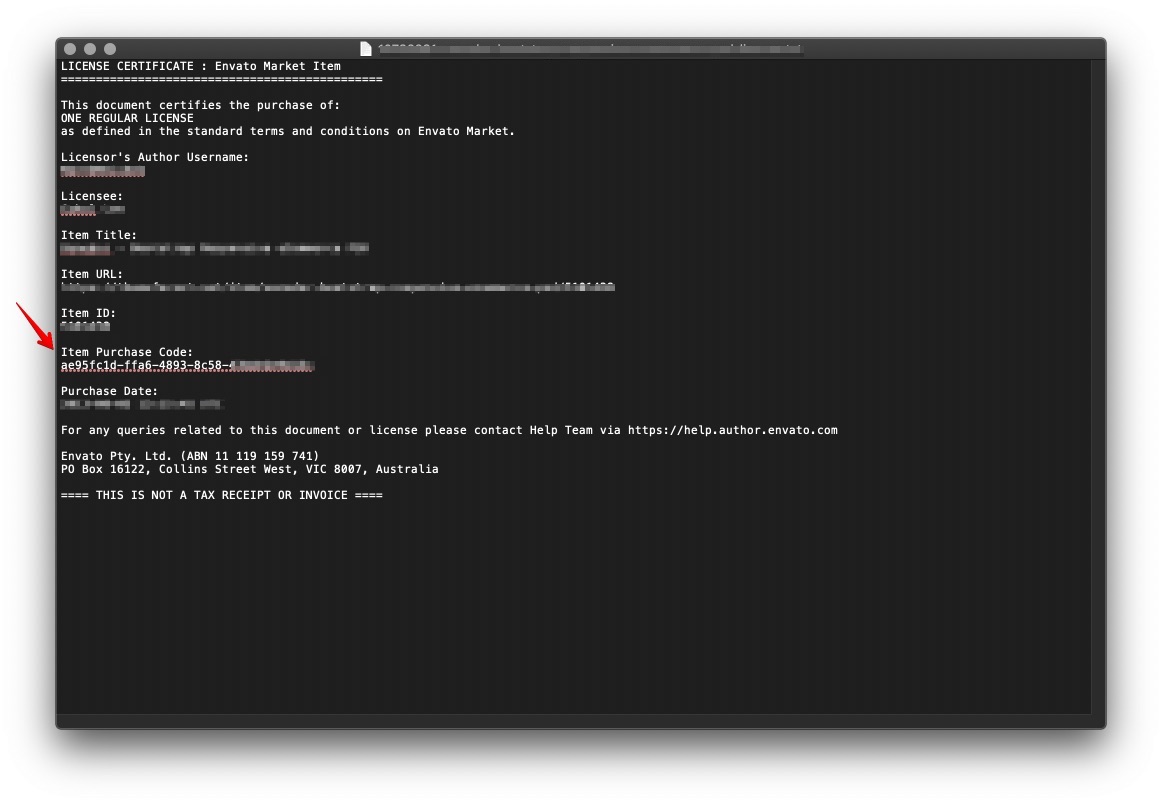
Open the text file and copy your purchase code. -
Paste it to theme settings at Online store -> Themes -> Customize -> Theme settings -> License -> Purchase code
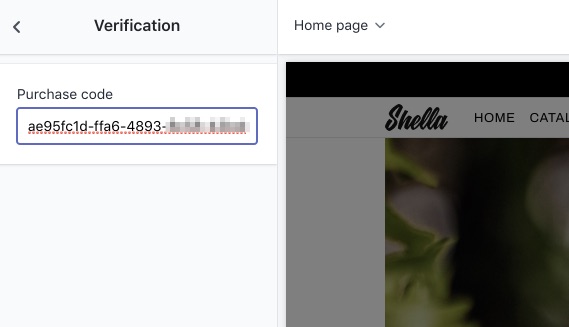
Add the purchase code to theme settings. - Save theme settings
Envato Market Help Page
If you can't find a purchase code at your Themeforest account, please check Where Is My Purchase Code? help page for more details.
Update theme
Usually, the theme files are edited by webmasters or apps. Major theme updates include a lot of changes. That is why it is no easy task to update the theme.
All the theme versions are tested before release. Update to the latest version is not obligatory. You may stay with your current version.
You can review change log at Themeforest description page
If you have a highly customized store or want to install a major theme update, I recommend starting from scratch. Please note, a major update is from version 1 to version 3, or from version 2 to version 3. A minor update is from version 3.1.x to 3.3.x. A bugfix update is from 3.3.1 to 3.3.4.
The following update process is good for minor and bug fix updates.
The update process is similar to the installation process with one additional step - copy theme settings.
Duplicate your current theme Online store -> Themes -> Actions -> Duplicate.
This is a backup copy in case something went wrong.
-
Upload the latest theme version to your store. Check Install theme for more details.
-
Open
config/settings_data.jsonfile at your current theme at the online editor.Theme actions -> Edit code.
Copy file content.
-
Open
config/settings_data.jsonfile at the latest theme at the online editor.Paste content and save file.
-
Check app configuration. Perform installation steps if needed.
-
Apply custom code changes. If your store has it.
Video manual. How to update theme
Install apps
The Shella theme is compatible with all popular apps.
If you have issue with app installation or app usage. Please contact app's support first.
If app support has questions about theme files, he or she can email questions to support@mpthemes.net
Here is the list of recommended apps
- Product Reviews. (free, optional, product reviews)
- Install Product Reviews app
- Press "Add app" button and proceed with general app installation procedure.
- Set "Star icon color" to
#fec01aat Store Admin -> Apps -> Product Reviews -> Settings
- Metafields Guru. (free, optional, labels, countdown, product video)
- Go to Shopify App Store Metafields Guru app
- Press "Add app" button and proceed with general app installation procedure.
- Check meta fields supported by the Shella theme.
- Weglot Translate. (paid, optional, multi-language)
- Go to Shopify App Store Install Weglot Translate app
- Press "Add app" button and proceed with general app installation procedure.
- Request 20% discount coupon at support
- ExIm (free, optional, import demo data)
- Go to Shopify App Store Install ExIm app
- Press "Add app" button and proceed with general app installation procedure.
- Find demo data inside theme package at
demo-datafolder.
- CustomerMeta (free, optional, wishlist, compare products)
- Go to page Install CustomerMeta app
- Press "Install" button and proceed with general app installation procedure.
Shella theme uses only CustomerMeta API and already included all needed theme assets.
Do NOT install theme assets inside CustomerMeta app!
- JivoChat (paid, optional)
- Go to page jivochat.com
- Sign up
- Use the code "MPTHEMES" to get the 15% discount.
- Growave (paid, optional)
Follow the link below and get an extended 30-day free trial.
- Go to page growave.io
- Sign up
Theme structure
In this section you will find general information of theme structure. How organized theme options and sections.
Theme package
When you download ZIP file from Themeforest, don't upload it at Shopify store. You have to unzip it, find theme ZIP file inside and follow installation steps.
Theme package includes
/themeforest-shella-***-theme.zip
/!-start-here.html/!-upload_me_Shella_theme_X.Y.Z.zip/demo-data//user-manual/
| File/Folder | Purpose |
|---|---|
/!-start-here.html |
Read me file with quick start information. |
/!-upload_me_Shella_theme_X.Y.Z.zip |
Theme ZIP file. Upload this file to your Shopify store. |
/demo-data/ |
Demo data from our demo store. It includes Pages, Blog posts and Theme settings. You can import demo data using ExIm app. Check install theme article for more details. |
/user-manual/ |
index.html file with redirect to online user manual. You are reading it right now. |
Theme settings
Online Store -> Themes -> Customize -> Theme settings - this the first location where you should look for theme options.
Here you can change general theme setting, which applies to all store pages.
Logo, Typography, Colors, Layout, etc. All options has description and should be clear for you. If you don't find needed option try to search in sections.
Check Editing theme settings Shopify help page for more information about theme settings customizer
Dynamic sections
These sections available only at Home page. You can build a unique home page for your store using dynamic sections.
Online Store -> Themes -> Customize -> Sections -> Add section to add new section. You can also delete dynamic sections and change position.
Shella theme includes many dynamic sections like Product carouse, Collections, One product, Brands carousel, Article carousel, Builder.
Builder section is most power full. It has many block types. You can set custom width per each block. Banners (Promo boxes), Sliders, Instagram, etc.
Static sections
These sections is used for mandatory, static elements. Static sections may be global, available at all store pages, like Header, Footer, Popup, etc
You can change sections options at Online Store -> Themes -> Customize -> Sections. You can remove static sections.
Page sections
This is most hard to find sections. They are unique per product page. You should first navigate to needed page to see static sections available for this page.
For example: 'Product Page' and 'Related products carousel' sections for product pages. 'Sidebar' and 'Head' sections for collection pages.
Please note, list of sections in the Sections tab will be different depending on the current page. You can navigate to a needed page via store preview or using Shopify page type switcher. Please check the Editing theme settings Shopify help page for more details.
Demo content
Theme package includes theme settings, pages and blog posts from our demo stores. You can find it at demo-data folder at theme package.
You can import demo content using ExIm app.
Please note, you have to add your products, collections, configure navigation menus and upload banner images by yourself.
Please note, images are not included into the theme package.